Creating Tasks and Challenges
Locating the Tasks and Challenges List
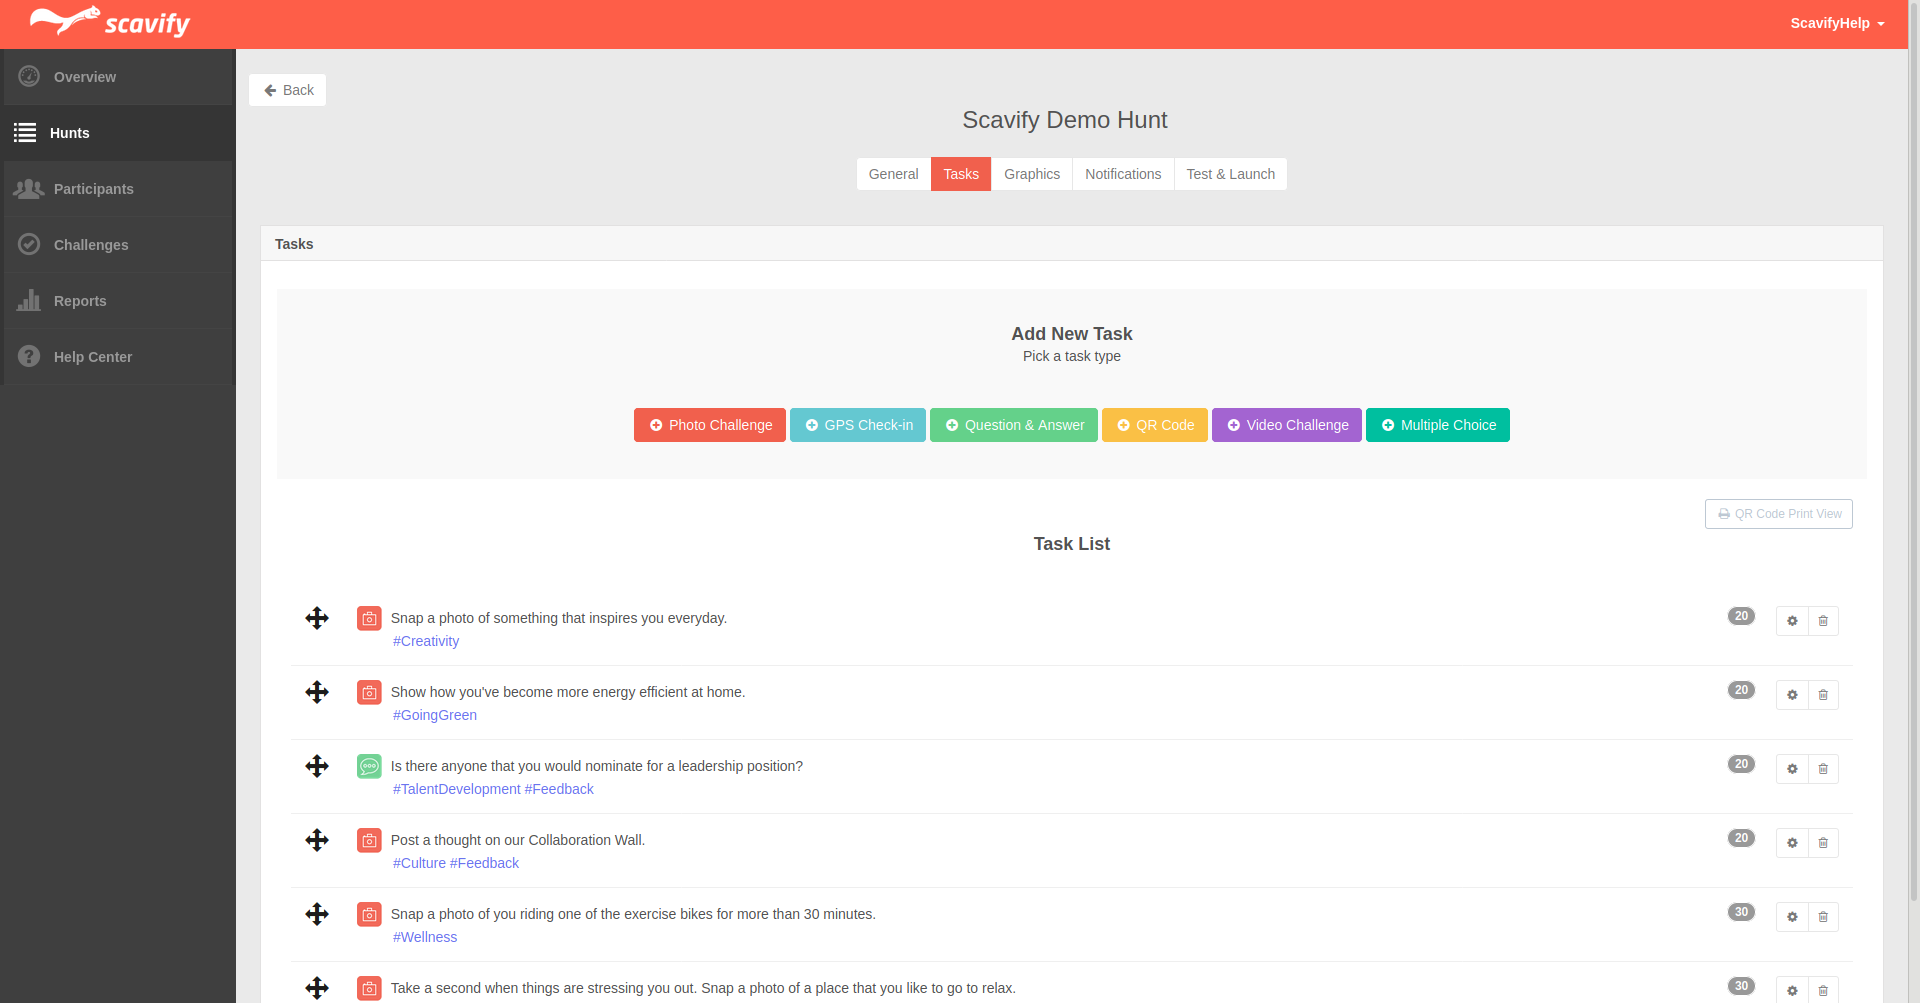
In order to build and customize your program you will first need to log in to your admin. Once you have logged in to your admin, click on the hunts menu option, from the hunts page click "Drafts" and click on the name of the program you would like to customize and click on the "Tasks" tab. If you have already launched your hunt use the "Active" or "Upcoming" tabs from the hunt page, then click "Edit Hunt" after selecting the program you want to modify.
Adding Challenges
One of the most important parts of customizing your program is creating the list of tasks and challenges participants will complete. Adding challenges is easy through the admin. First, click the "Tasks" tab in the step-by-step builder to locate the tasks and challenges list. Above the list you will see a section labeled "Add New Task". Inside that section you will see 6 buttons - one for each task type. Click on the button for the type of task you want to add to your list and you will see a form appear for you to enter the details of the task.
Each task type has different information that you will need to enter to add it properly. You will always set a Text Description and Points for a challenge, but depending on the challenge type you may need to enter additional information. Each task type is outlined below in detail. Once you have filled out the details for the task, click the "Create New Task" button at the bottom of the form to add it to your list. The task will now appear on your list ready to go.
- Go to the "Tasks" tab in the step-by-step builder.
- Click one of the buttons in the "Add New Task" section for which task type you want to add.
- Enter the task details.
- Click the "Create Task" button.
- The task will now appear on the list of your tasks and challenges.
Shared Functionality
All challenge types share a certain set of functionality. From scheduling to push notification options - the following details will be available for each individual type.
Tags
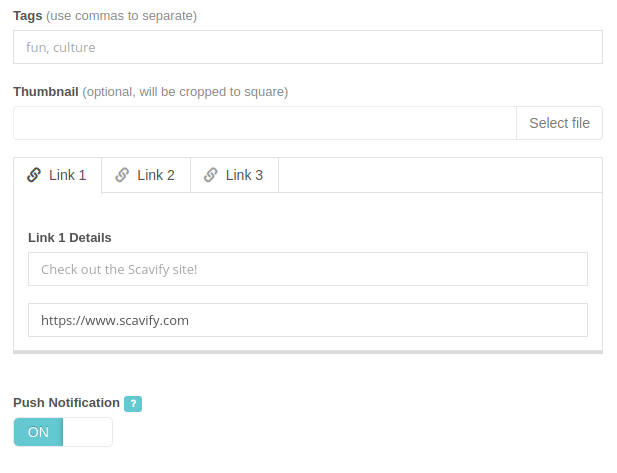
Use tags to add advanced reporting functionality to individual challenges - the tags have don't alter gameplay, they are used for the Hunt Administrator reporting purposes only. To use, simply enter tags separated by a comma.
Thumbnail
Bring challenges to life with an image thumbnail which will be displayed in the app when users select the challenge from the task list. Use the "Select file" button to upload any image to be associated with any individual challenge, note that all thumbnail images will be cropped to a square on upload.
Links
Provide up to 3 links per challenge to be displayed inside the app when users select the challenge from the task list. Simply enter the text you want displayed and the URL that you want users to be directed to when they tap from inside the app.
Push Notification
Toggle button to enable or disable push notifications for any individual challenge. This sends a push notification to all participants notifying when this individual task has become available. This gets triggered if adding a new task to a live hunt, or if using the schedule date - a push will be sent when the task becomes active.
Task Scheduling
Use the date & time picker to set a schedule date for any individual challenge. This allows challenges to appear in the app on future dates. This will use the timezone of the hunt.
Visibility
Toggle button to show & hide any individual challenge from the hunt.
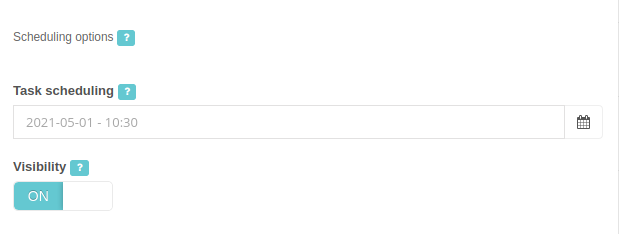
Photo Challenges
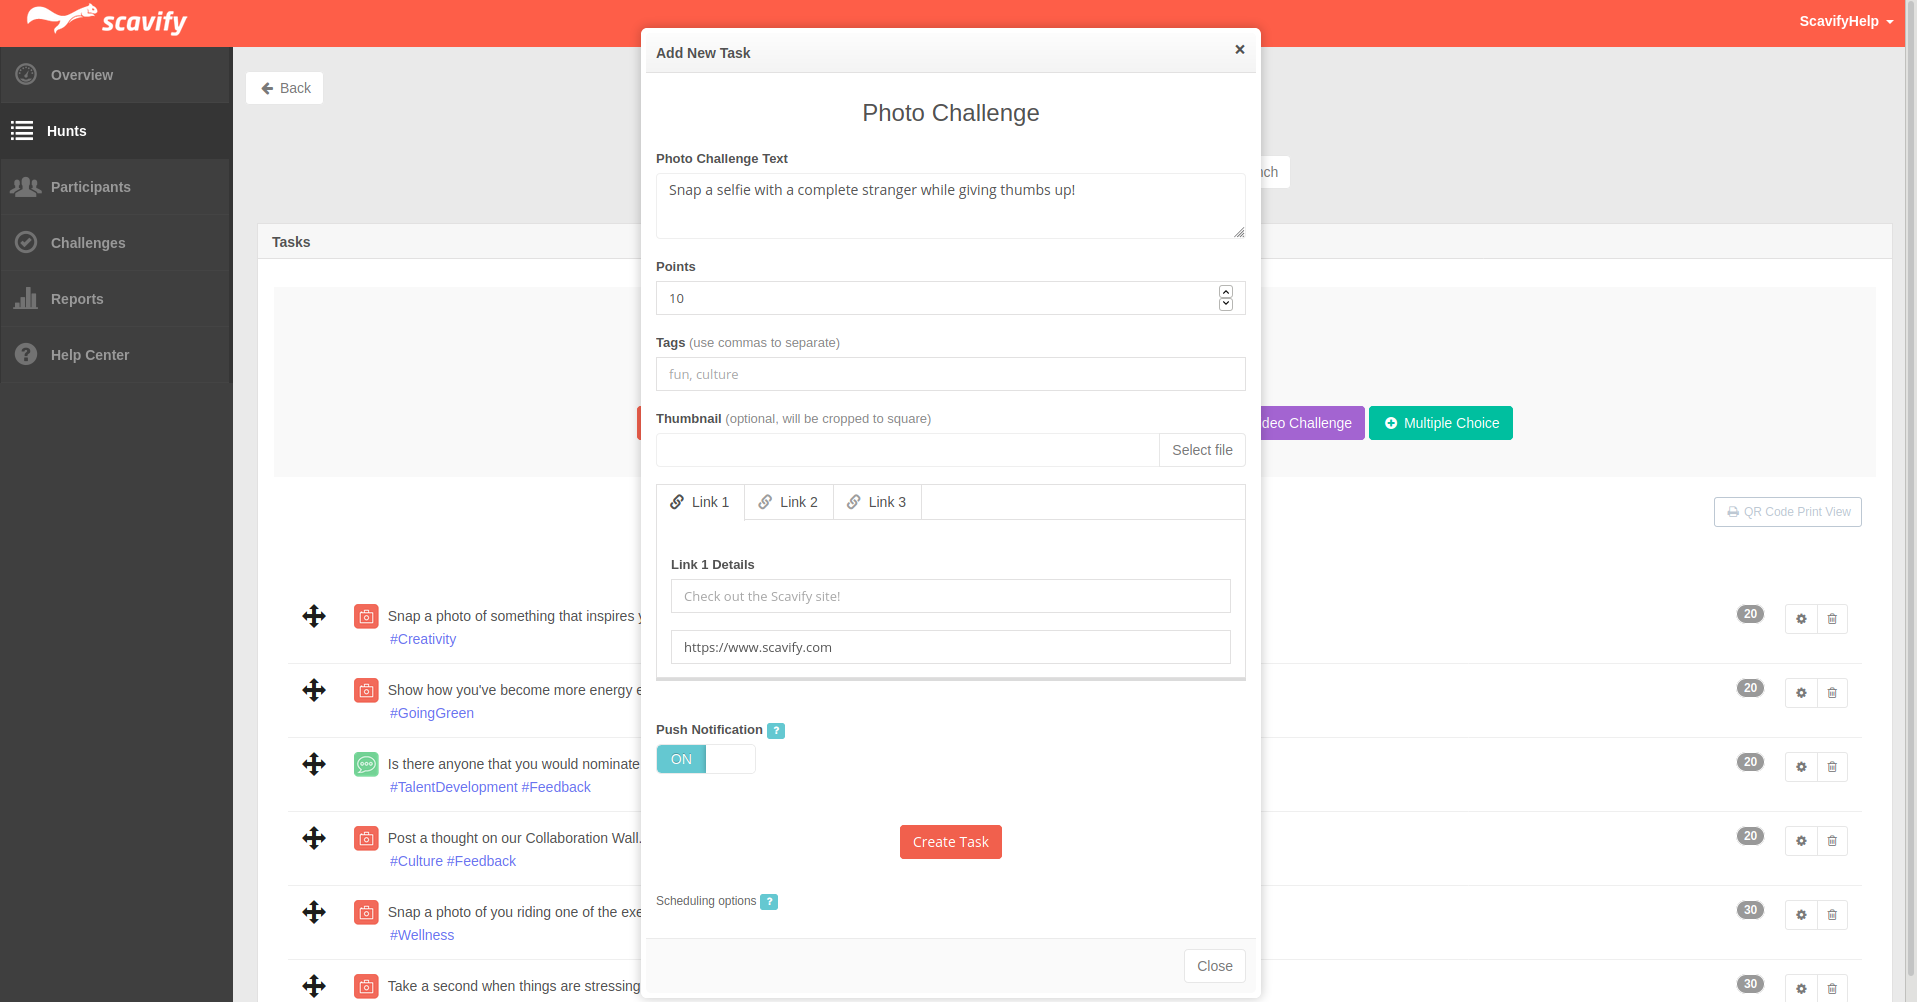
Photo tasks are one of the simplest, yet most interactive task types. Simply create a text prompt outlining what a participant needs to snap a photo of to complete the task, assign a point value and that’s it. Participants can then upload photos in the app to successfully complete each task.
Photo Challenge Text
This is the text prompt that will tell participants what you would like them to take a photo of to complete the task. This will be what appears in the app for participants on the list.
Points
The points you would like to assign to a successfully completed task.
Photo Challenge FAQs
Answers to a few frequently asked questions regarding photo tasks.
What happens if a photo uploaded does not match the task prompt?
Photos can be flagged or deleted from your desktop admin. Flagging will remove the points from the participant’s point total and notify them so they can have an opportunity to retake the photo if they wish.
Does everyone see each other’s photos?
This is optional. If the Photostream is enabled then everyone will see a feed of each other's photos. This can be disabled to create a more individual experience for each participant as may be the case for interactive tours.
How do people share their photos with social media?
Participants can share their photos directly within the app to social media outlets, including Facebook, Twitter, Instagram and E-mail.
GPS Check-in Challenges
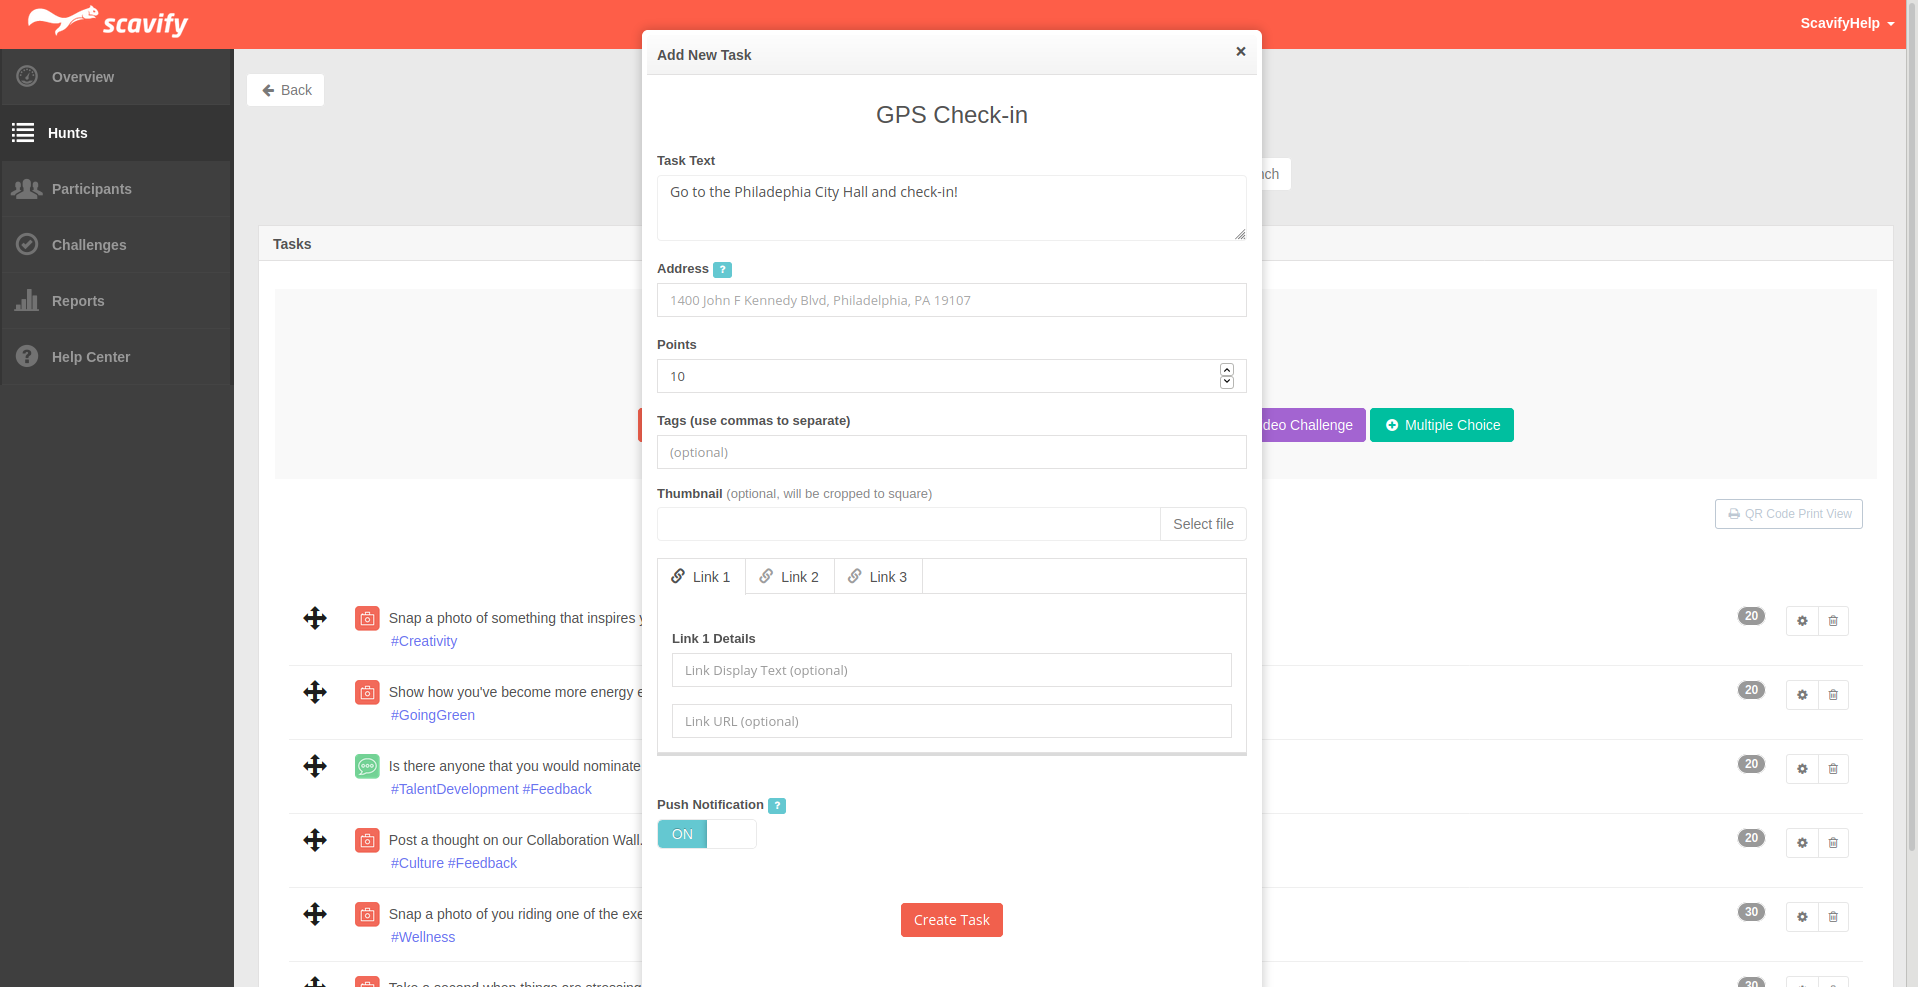
A GPS Check-in task is created by getting the coordinates of a specific location and setting a radius around those coordinates that participants must be within in order to complete the task successfully. In order to get the points associated and complete the task successfully participants must be within the specified distance of the location. The app will verify the participants location automatically when they attempt to complete a GPS Check-in task.
To make it easier you can simply supply an address for the task and we will set the corresponding latitude and longitude as well as a default radius. Using the address and default radius is the recommended way to add a GPS challenge but you can always click on the "Advanced Options" to supply your own latitude and longitude and override the default radius if you have specific needs for your program.
Task Text
This is the text prompt that will tell participants where they need to be to successfully complete this task. This will be what appears in the app for participants to view on the list. Using a clue or riddle as the text description rather than simply telling them where to go creates a more difficult and challenging task.
Points
The points you would like to assign to a successfully completed task.
Address
The address where you want people to check-in. This address will be converted into coordinates automatically. If your GPS Check-in does not have an address or you would like additional precision of the location use the "Advanced Options" link to supply your own coordinates.
Advanced Settings
Longitude
The longitude of the coordinates you are supplying. Please use decimal format.
Latitude
The latitude of the coordinates you are supplying. Please use decimal format.
Radius
The radius (in feet) that you would like to set around your coordinates, which will be used to determine if a participant has successfully completed the check-in. Participants must be inside the radius from the coordinates to successfully complete the task.
Question and Answer Challenges
There are 2 types of Question & Answer challenges:
- Exact answer
- Open ended answer (feedback)
Exact Answer
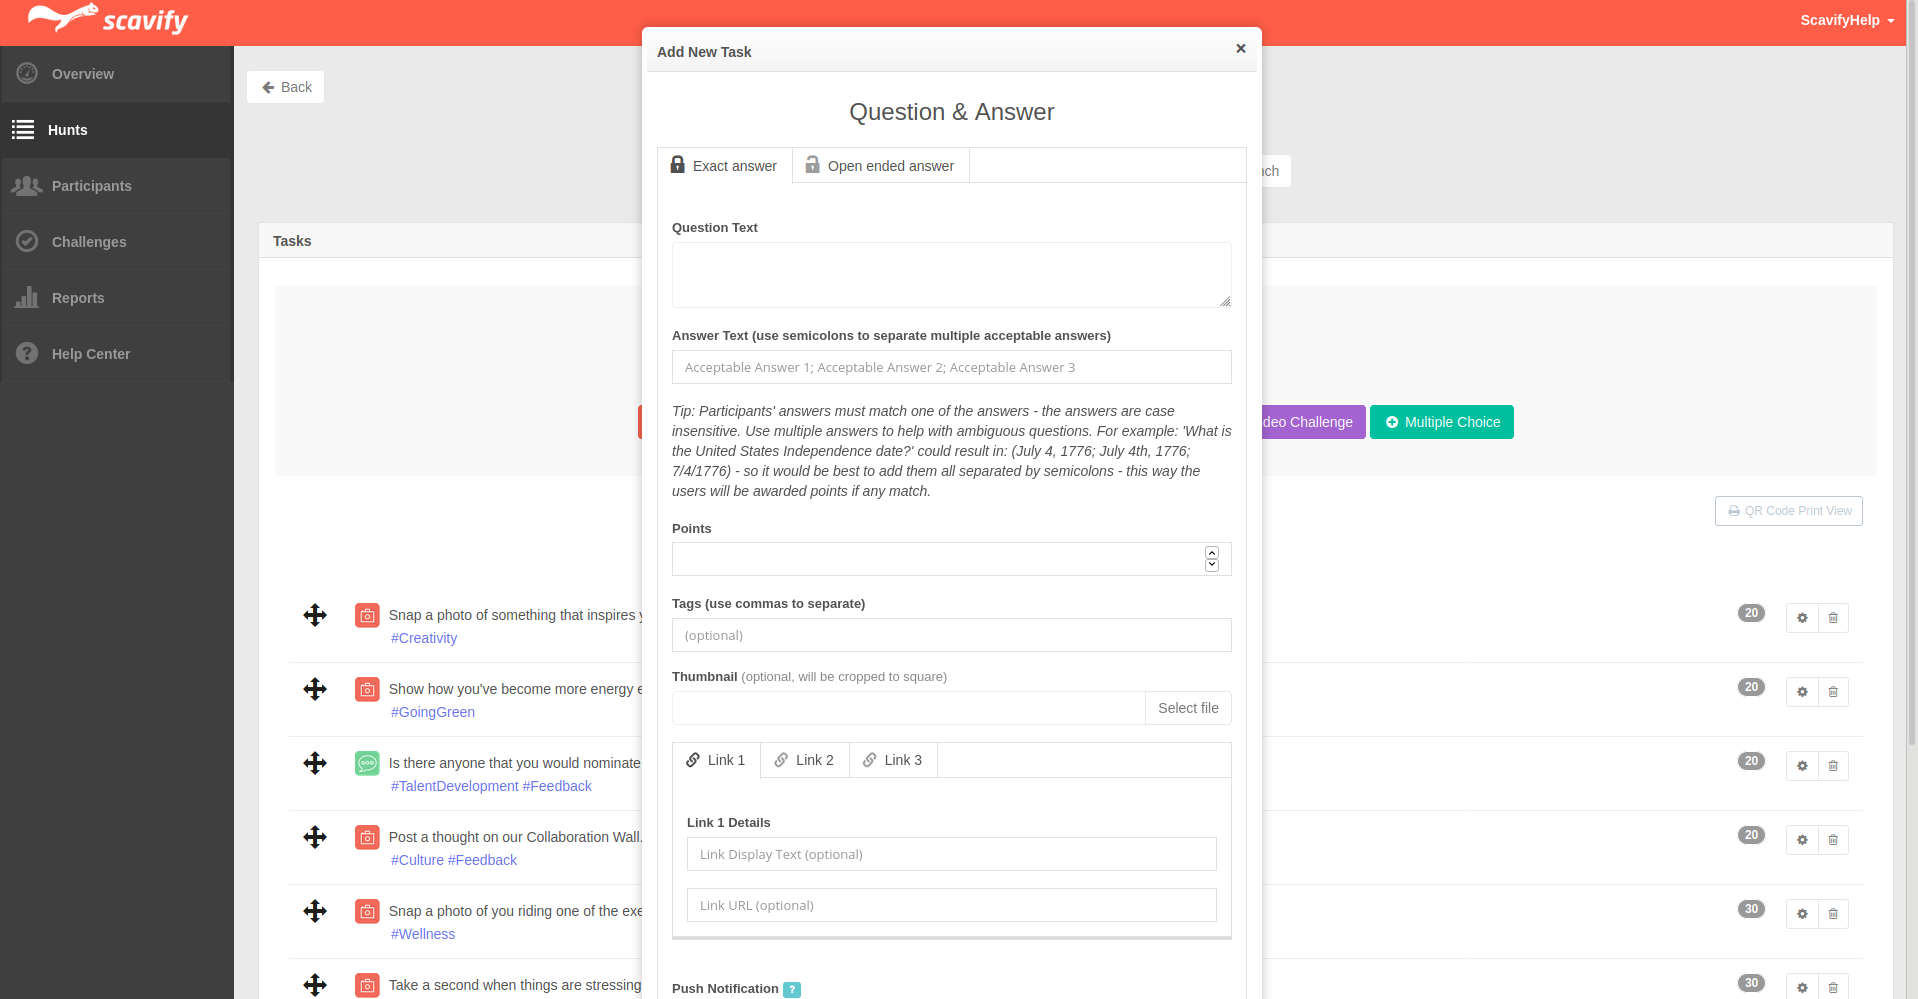
Exact answer Q&A challenges are text based tasks that prompt participants with a question, clue or riddle that they must answer correctly to complete the task. When completing the task, participants enter their answer and if it matches the answer you provided then they are awarded the points for that particular task. Keep in mind that answers must match exactly (not case sensitive).
Open Ended Answer
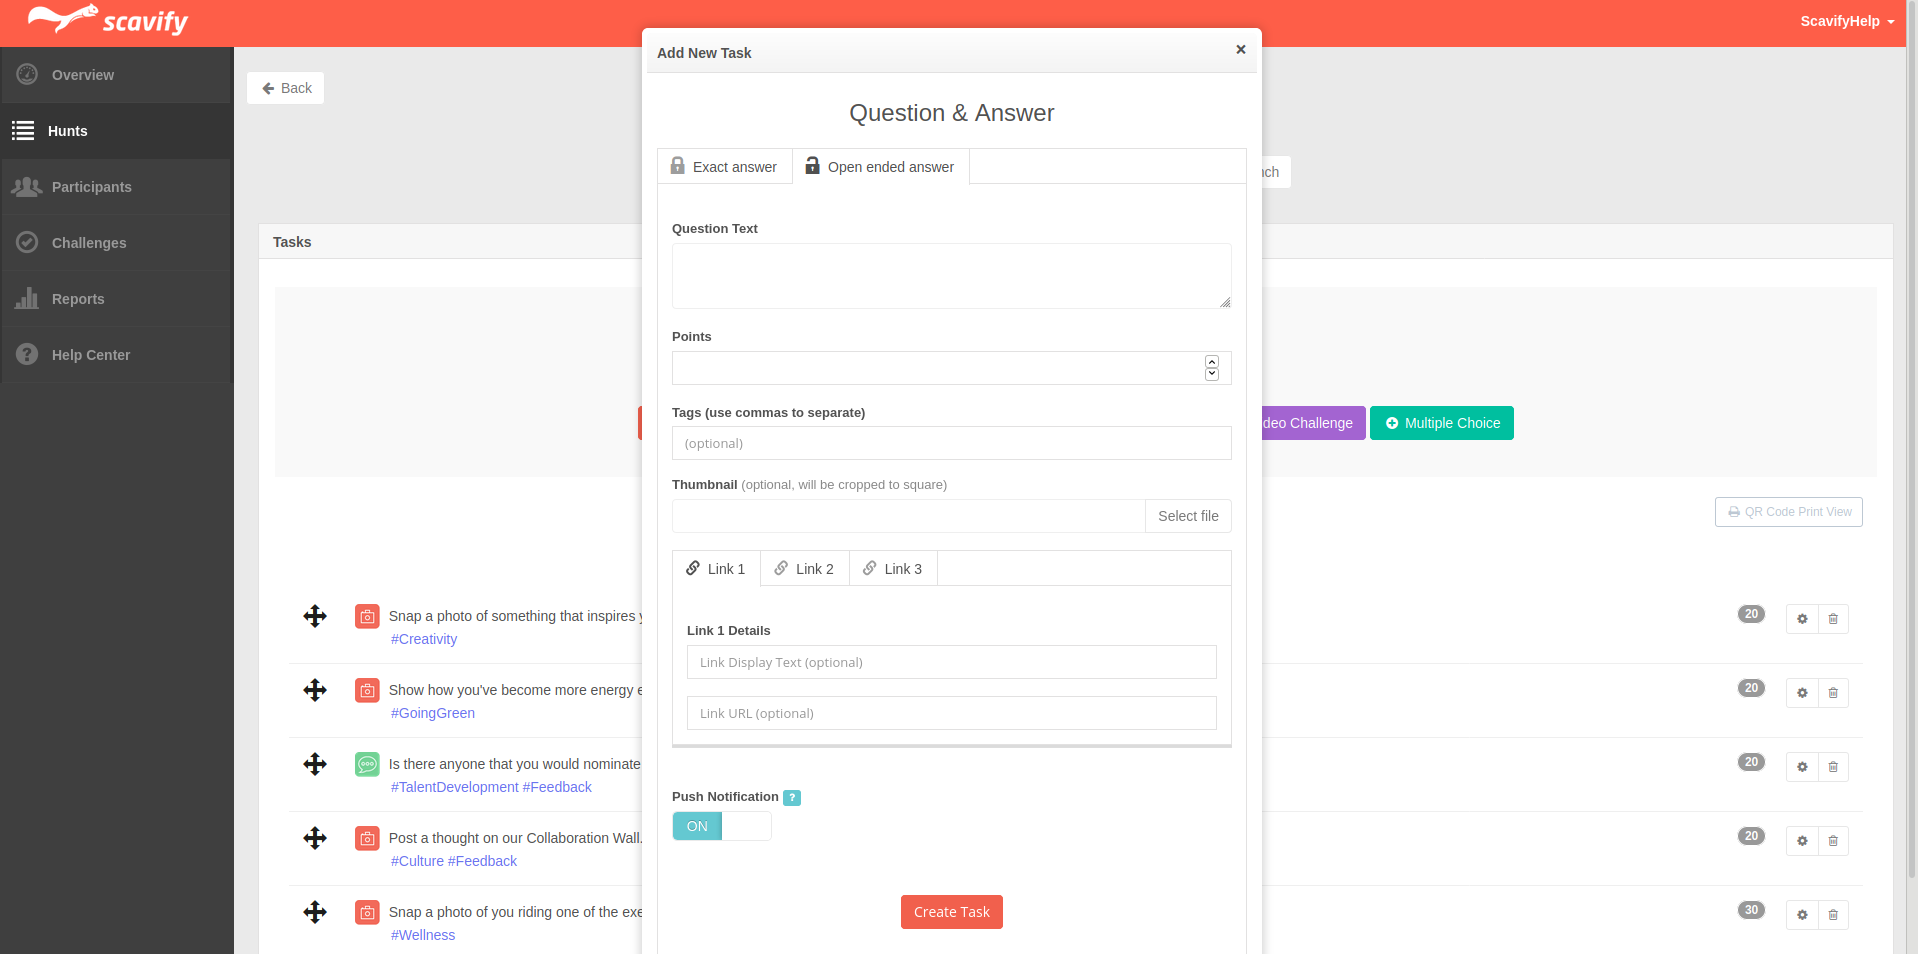
Open ended answer Q&A challenges are used for collecting feedback from participants. With this challenge type any feedback provided will successfully complete the task and award points.
Question Text
This is the question text that you want participants to answer.
Points
The points you would like to assign to a successfully completed task.
Question & Answer FAQs
Answers to a few frequently asked questions regarding Question & Answer tasks.
Does the answer have to be an exact match?
Yes, answers for the "exact answer" type must match exactly but they are NOT case sensitive.
What happens when a participant submits the wrong answer for exact answer types?
If a participant enters an incorrect answer they will receive a message saying that the answer they submitted is incorrect and to try again. Incorrect answers may be tracked inside the Dashboard by Hunt Administrators.
QR Code Challenges
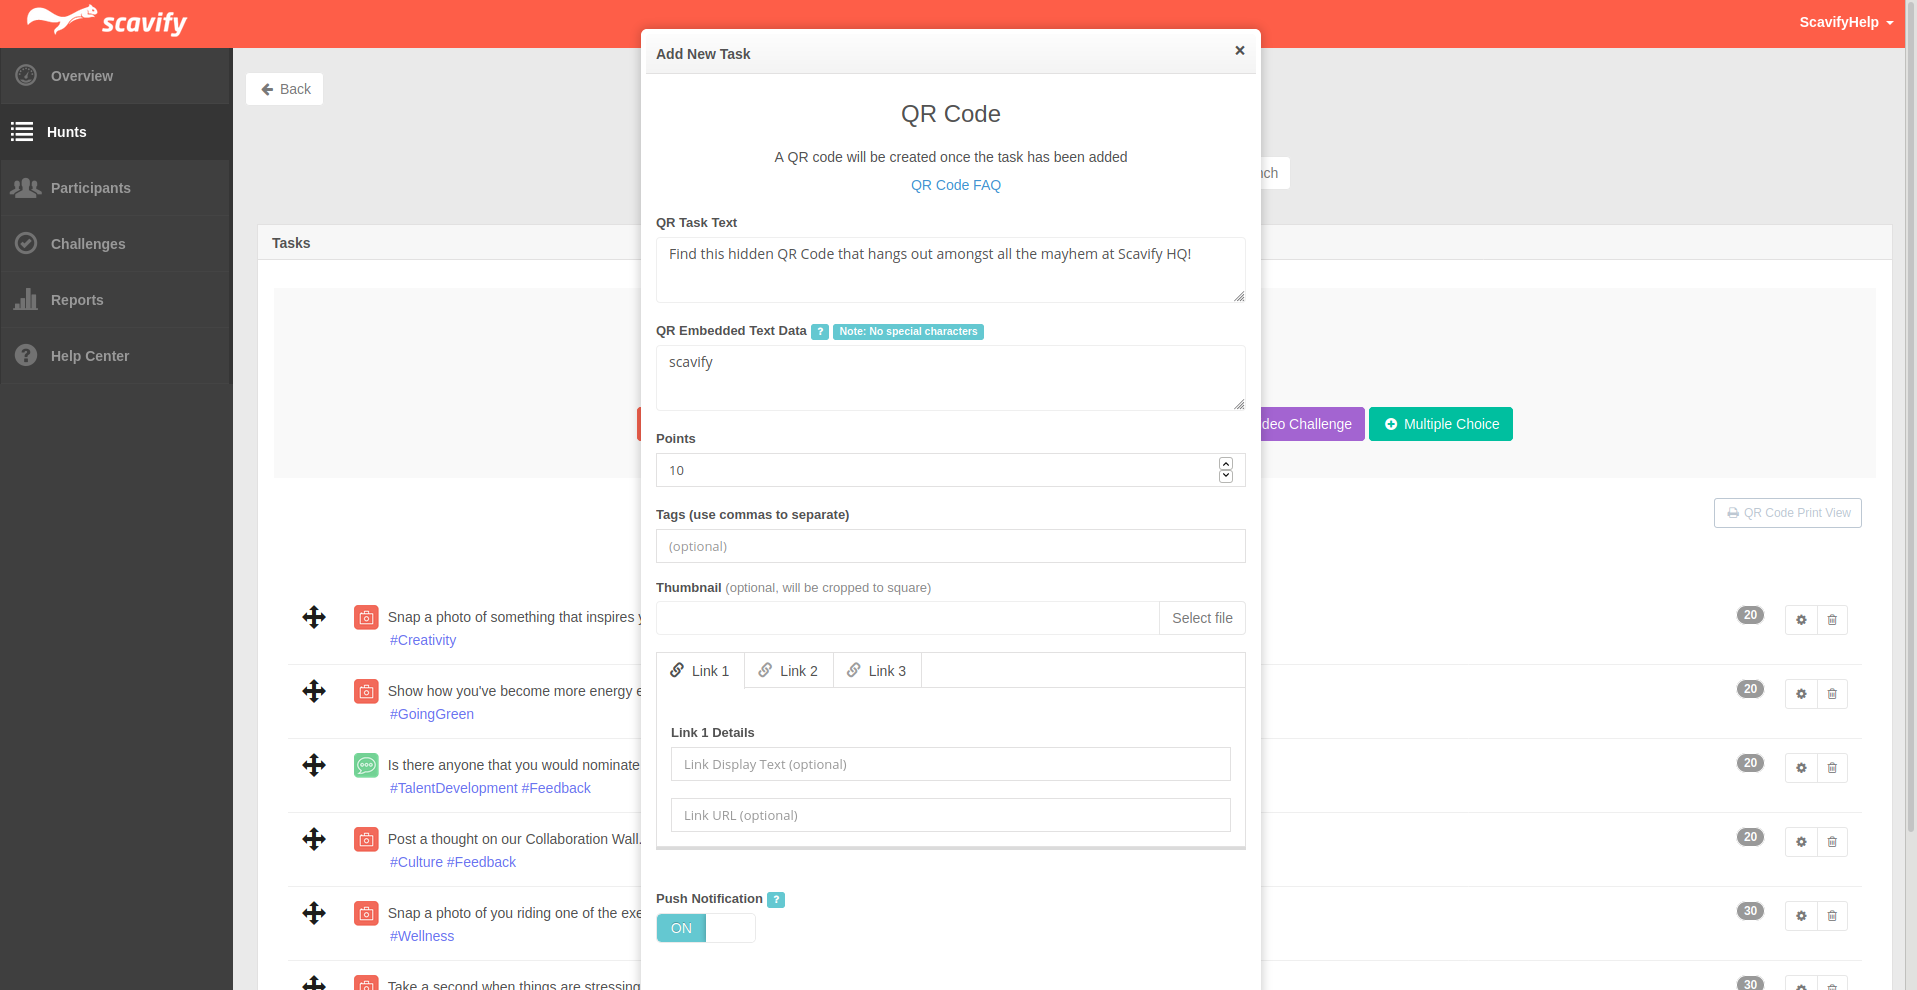
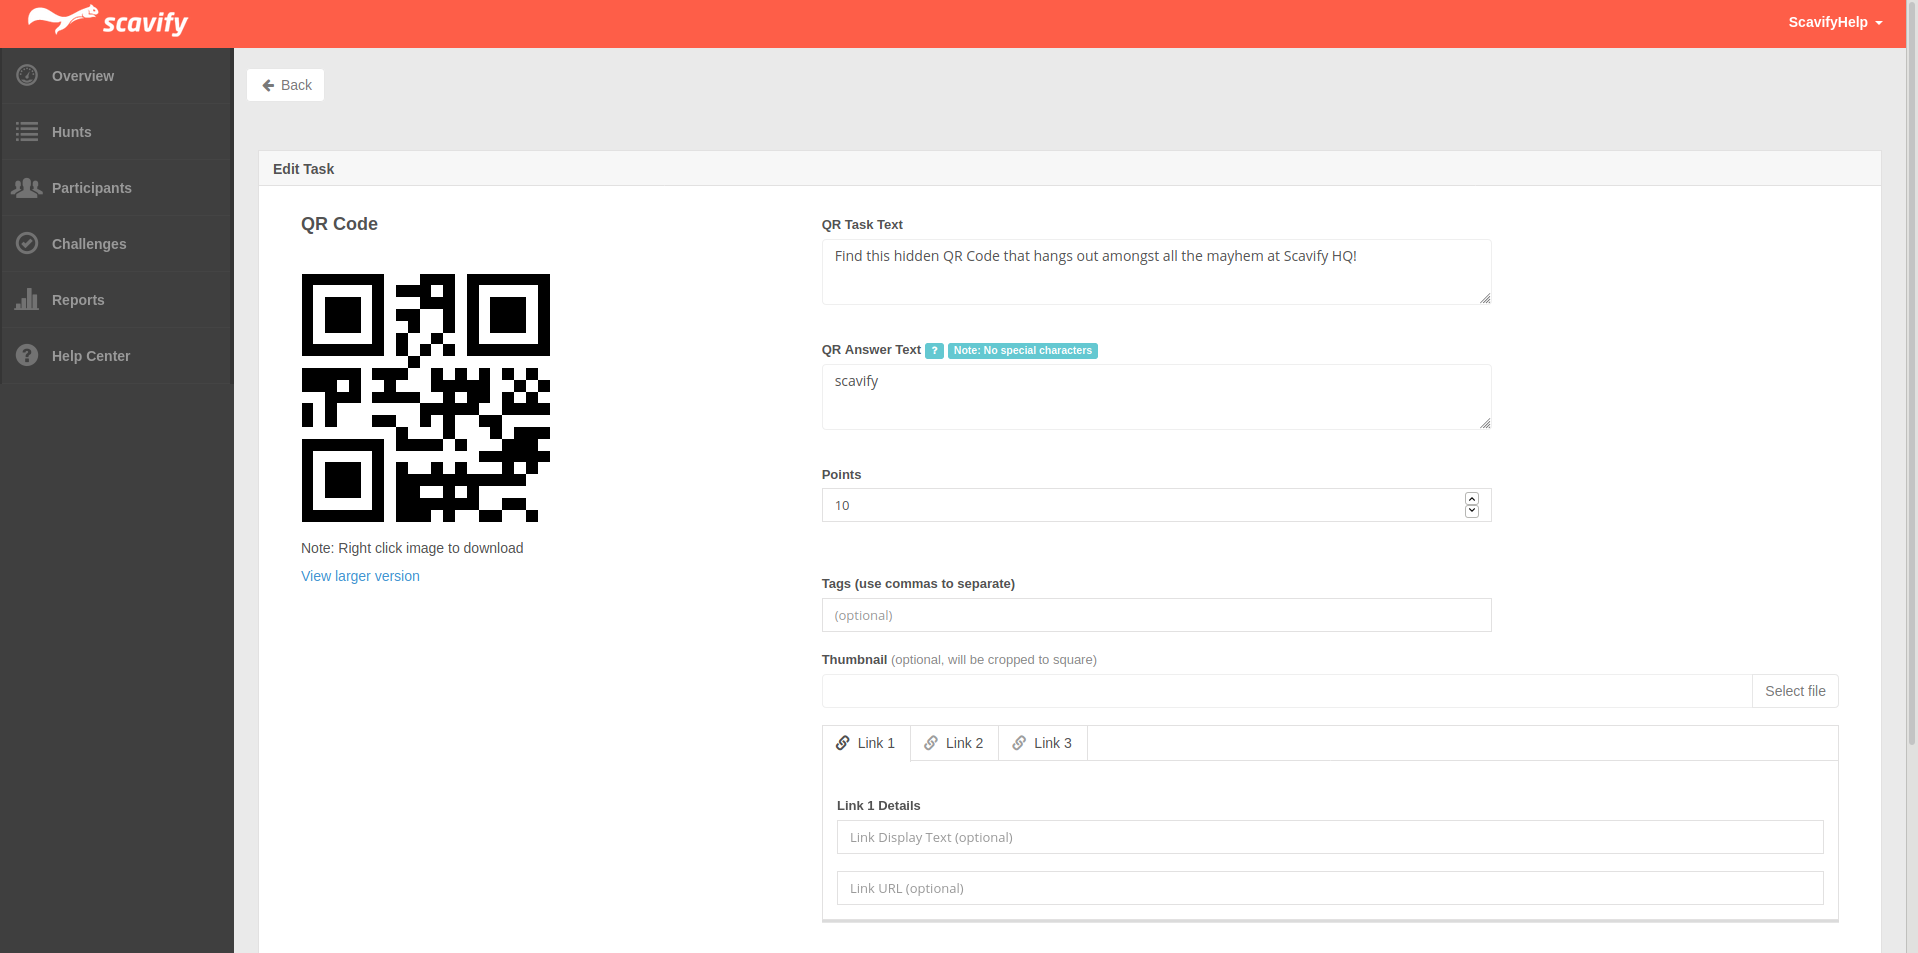
QR codes are scannable codes that participants must scan to earn the points for the task. QR codes work well when they are printed out and hidden using the task description as a clue for where to look. You can also digitally hide them by placing them on your website or social media. The hunt creator simply enters a word or phrase and our hunt builder automatically creates a QR code to use.
QR Task Text
The text description of where the participant can find the QR code to scan.
QR Embedded Text Data
QR codes are graphic representations of interpreted data. The Scavify system takes text and converts it into a QR code. Different text will create a different QR code image. The "QR Embedded Text Data" is only used to create a unique QR code and is not something the participant needs to know. As long as they scan the QR code that is created for the task they are completing they will successfully complete the challenge. Please don't use special characters.
Points
The points you would like to assign to a successfully completed task.
Viewing and Downloading the QR code
When you create a QR Code task, a QR code is automatically generated for you to print out or place in the location where participants will be scanning it. To view the QR code, click the "View QR Code" link next to the QR code task in the list.
To download the QR code click the "Download" link or right-click on the QR code image and choose "Save Image As..." to save it to your computer.
QR Code FAQs
Answers to a few frequently asked questions regarding QR Code tasks.
How do I create a QR code?
A QR code is automatically generated when setting up your QR code task.
Do participants scan the QR codes inside the Scavify app?
Yes. All of the scanning is handled directly inside the Scavify app for iOS & Android devices.
How do I make the QR codes unique?
Each QR code should be unique for each task. This is done by setting the QR code’s embedded data to something unique for each one.
Video Challenges
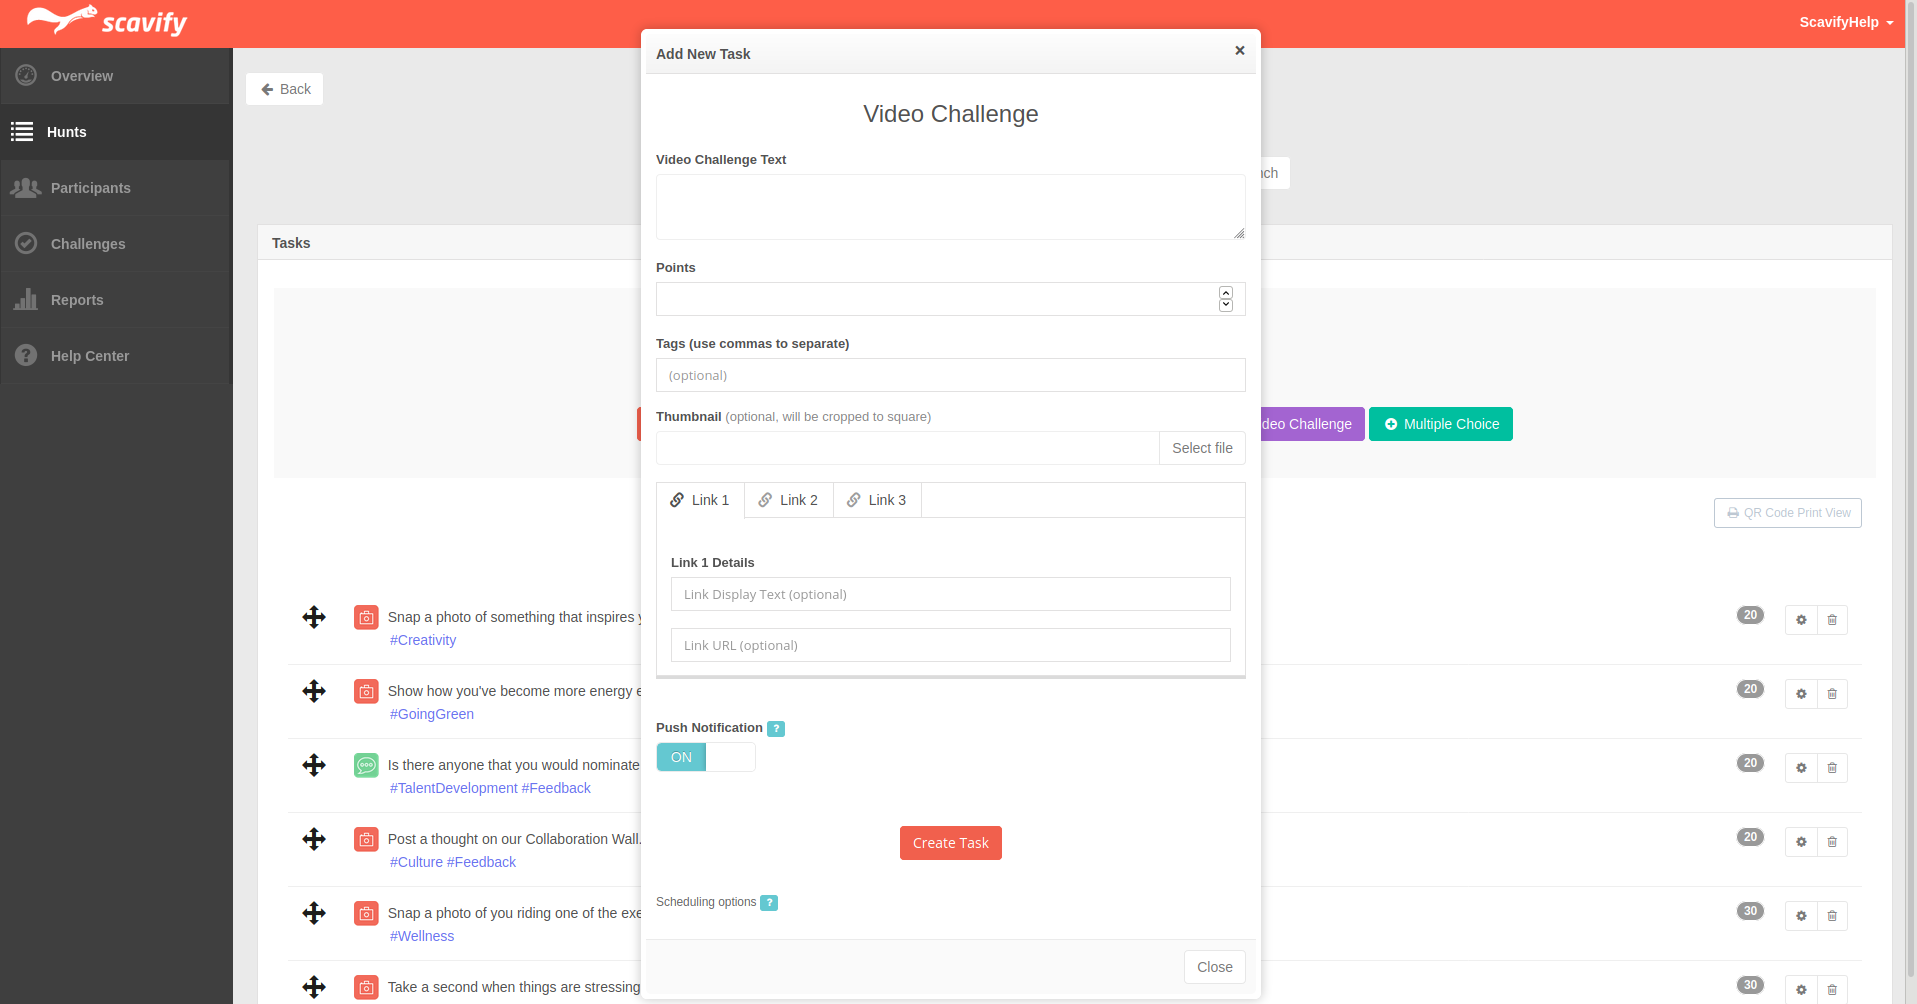
Participants can upload short videos to complete video challenges to receive points. Simply create a text prompt outlining what a participant needs to snap a video of to complete the task, assign a point value and that’s it. Participants can then upload videos in the app to successfully complete each task.
Video Challenge Text
This is the text prompt that will tell participants what you would like them to take a video of to complete the task. This will be what appears in the app for participants on the list.
Points
The points you would like to assign to a successfully completed task.
Multiple Choice Challenges
There are 2 types of Multiple Choice challenges:
- Single correct
- Multiple correct
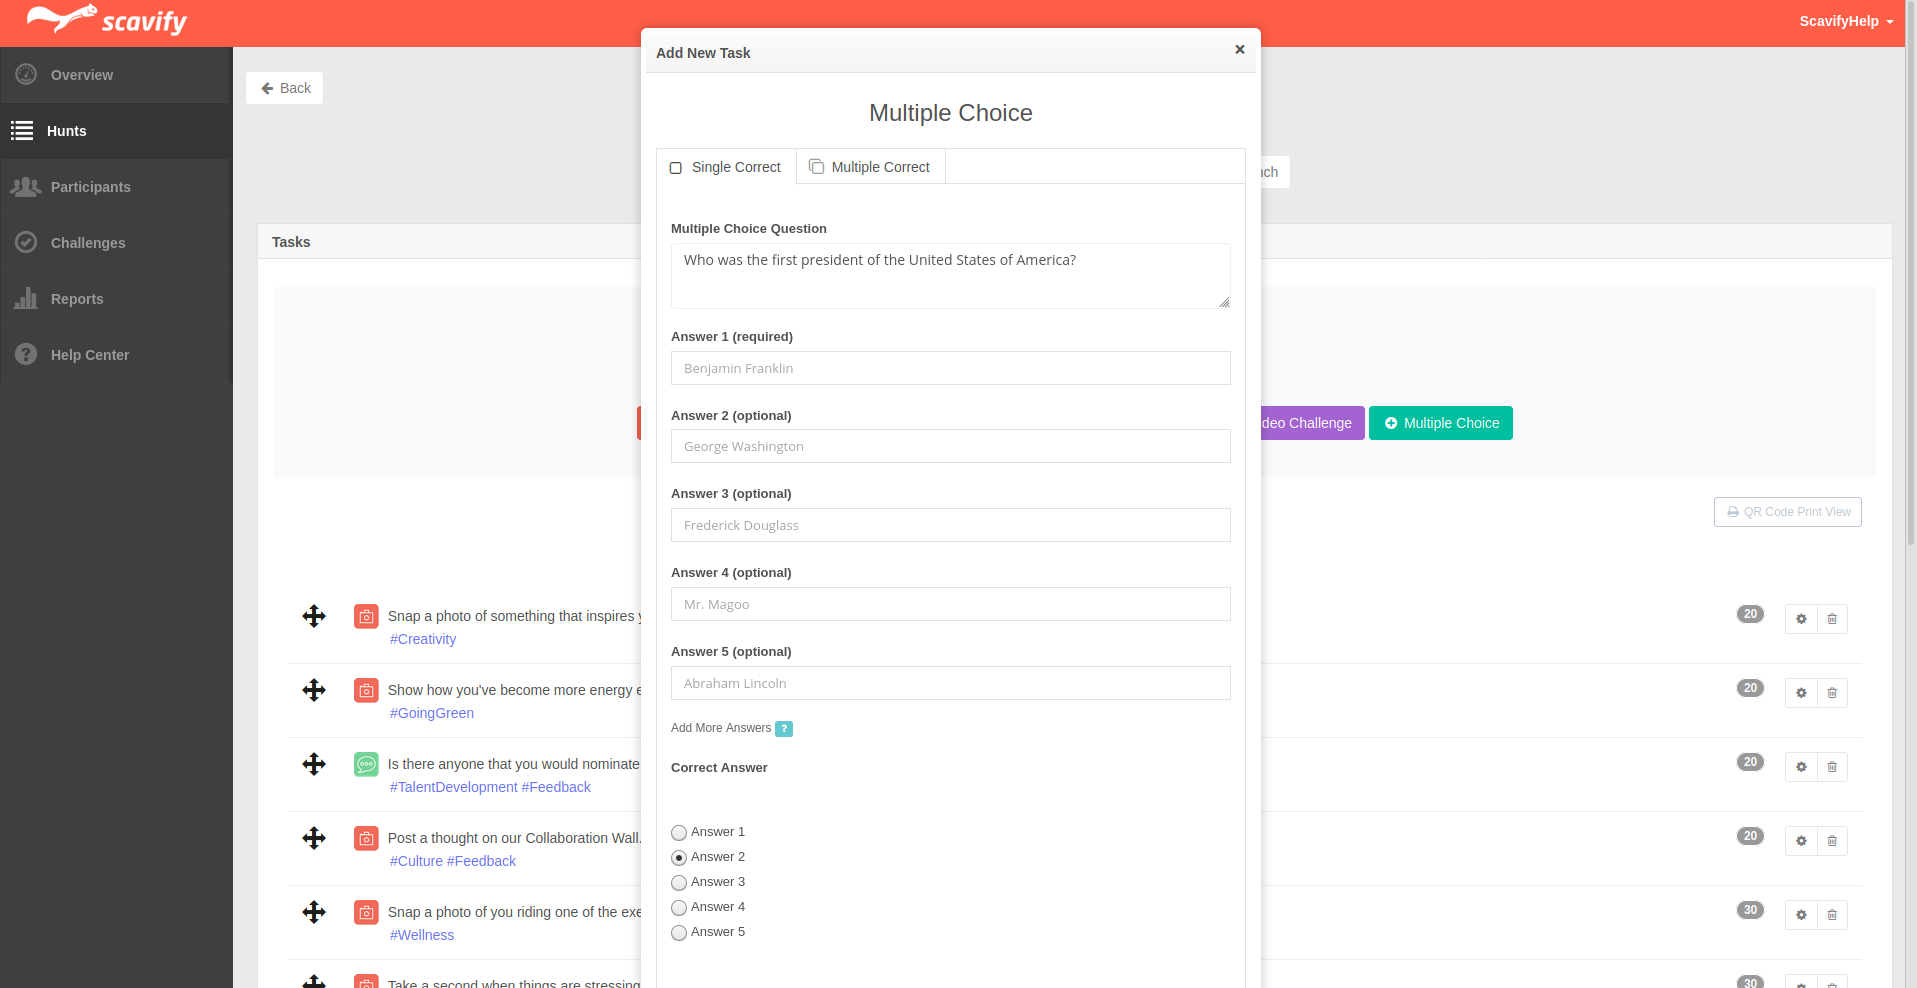
Single Correct
Single correct multiple choice challenges give the participant a list of options to choose an answer from and they can only select one, and there is only one correct answer. Participants only get one try to submit the correct answer, if they answer incorrectly they will receive 0 points and the challenge will be removed from the task list.
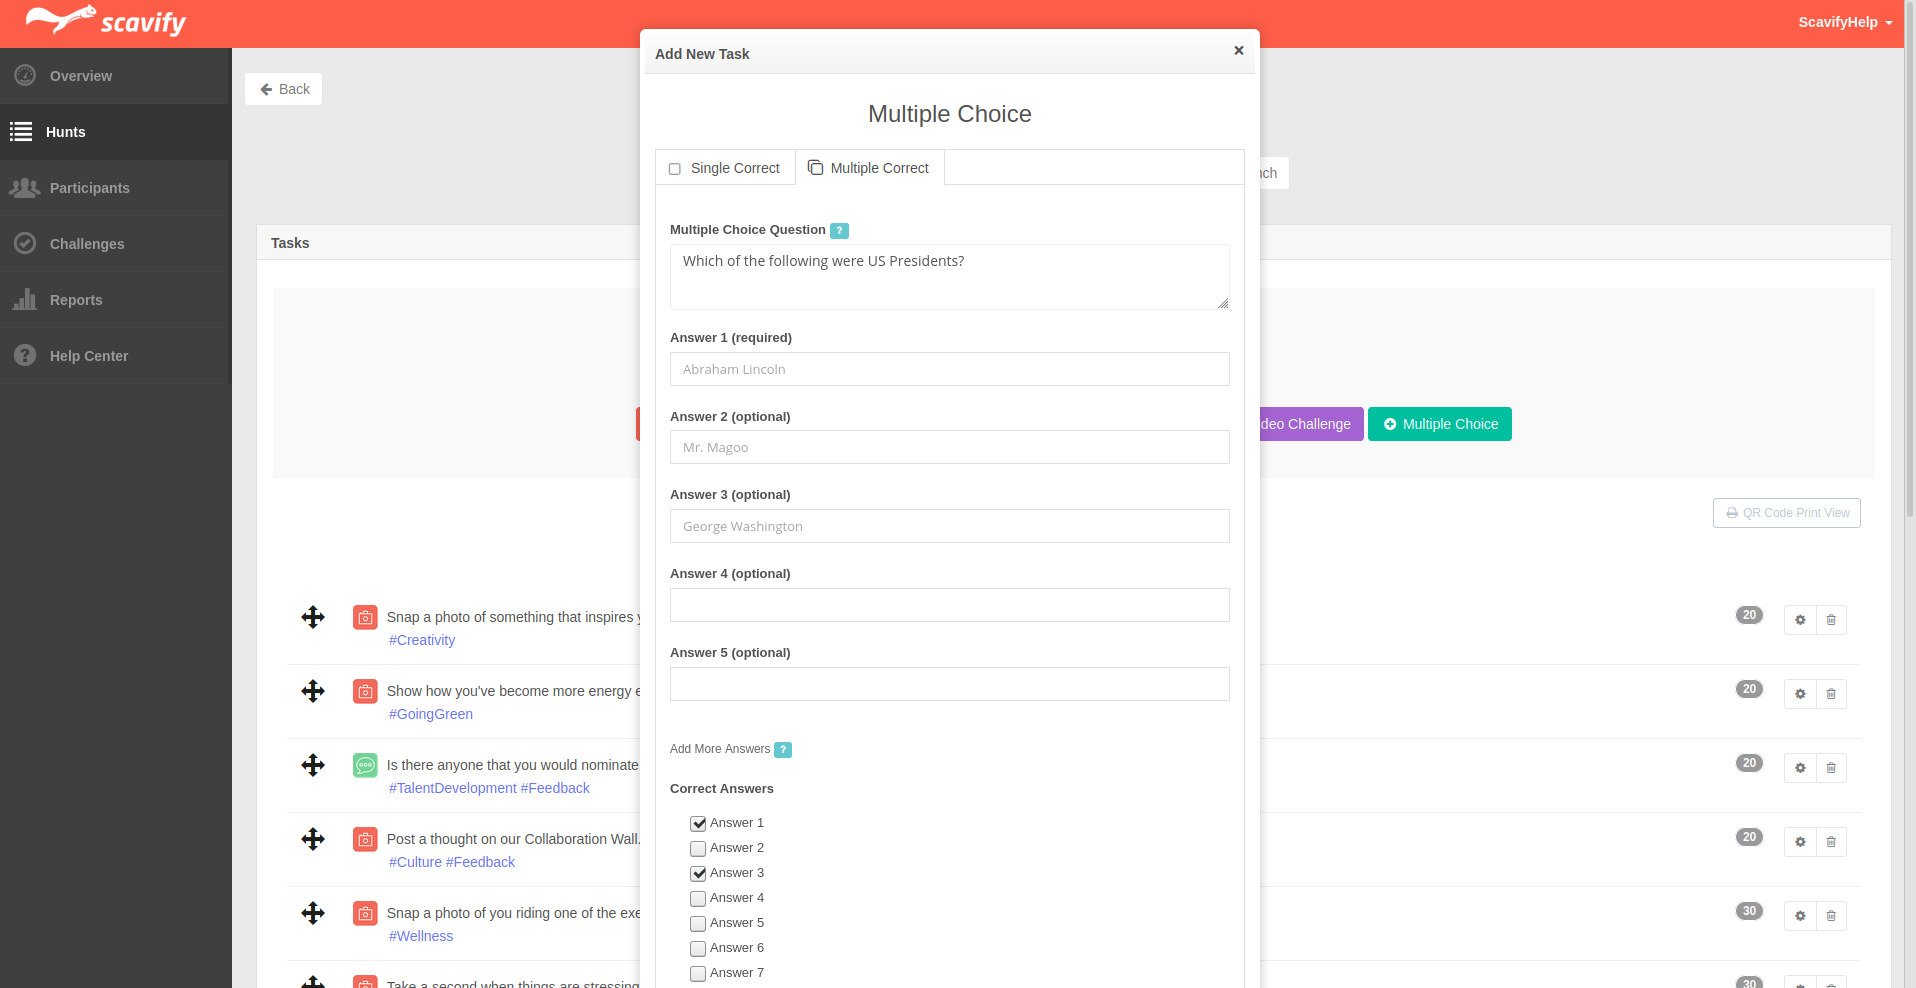
Multiple Correct
Multiple correct multiple choice challenges give the participant a list of options to choose an answer from and they can select multiple options, and they have to choose all the correct options to successfully complete. Participants only get one try to submit the correct answer, if they answer incorrectly they will receive 0 points and the challenge will be removed from the task list.
Editing Challenges
You can edit any task or challenge at any time by clicking the settings wheel next to the task or challenge you want to edit. This will bring up the task details page where you can make your edits and save the updated task.
Keep in mind that editing a task after participants have begun completing challenges in your program will change the task or challenge for everyone, including those who have already completed the challenge. This is important to keep in mind with photo challenges as significant changes to the text description may lead to previously completed photos not matching the text description anymore. In some cases it may be best to add a new task or challenge rather than edit an existing one.
- Click the settings wheel next to the task you want to edit.
- Edit the details of the task.
- Click the "Update" button to save the edits.
Ordering Your List of Challenges
Your list of tasks and challenges will be listed in ascending order by the point values associated with each task by default. You can change the order of your tasks and challenges by dragging and dropping individual tasks into the order you want them to appear in the app for participants. To drag and drop a task click and hold down on the drag and drop icon to the left of the task. Hold down the click and drag the task to where you want it to go and let go of the click. If you start reordering your task list, any new task will be added to the bottom of the list.
Note: Be sure to refresh your page to view an official order of your tasks.
- Click and hold the drag and drop icon to the left of the task you want to move.
- Drag the task to the position in the list where you want it to appear.
- Let go of the click.
Deleting Challenges
If you want to delete a task or challenge simply click on the trash icon next to the individual task you want to delete. It will ask you to confirm the deletion. Once you confirm you want to delete the task it will be deleted permanently. If you delete a task after any participants have already completed that task all points and associated data, including photos, will be deleted from their scores and progress permanently. You will NOT be able to get these photos back.
- Click the trash icon next to the task you want to delete.
- Confirm your deletion by clicking the "Delete" button.
- Your task is deleted permanently.
